In-depth Tutorial on Fixing a Leaky Tap: Skilled Advice
In-depth Tutorial on Fixing a Leaky Tap: Skilled Advice
Blog Article
Just about every person seems to have his or her own piece of advice in relation to How to fix a leaky tap and save water.

Intro
A leaky faucet is not only irritating yet can likewise throw away a substantial quantity of water and result in enhanced energy costs. In this detailed guide, we'll walk you through the process of repairing a dripping tap, enabling you to save water and cash while maintaining your plumbing system.
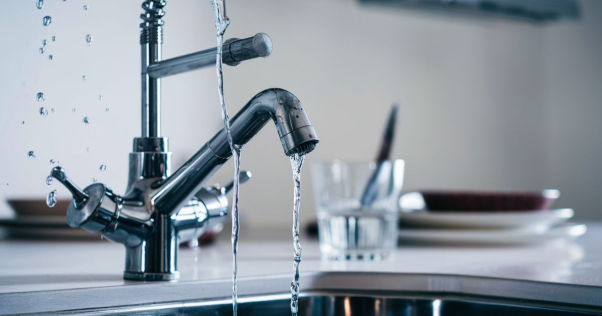
Evaluating for Damages
When you've exposed the shutoff assembly, check it for any type of indications of damages or wear. Typical offenders of a leaking tap consist of worn-out washers, O-rings, or seals.
Changing Faulty Elements
If you identify any kind of damaged or damaged components, very carefully remove them using a wrench or pliers and change them with new ones. Make sure to utilize the right size and type of substitute parts for your tap.
Reassembling the Faucet
After changing the damaged components, meticulously reassemble the tap in the reverse order of disassembly. Guarantee that all components are properly aligned and tightened to prevent future leaks.
Collecting Tools and Products
Before you begin, collect the essential devices and products for the repair work. You'll generally require a flexible wrench, screwdrivers, replacement washers or seals, plumber's tape, and a dustcloth or towel to clean up any type of spills.
Shutting Down Water System
Locate the shut-off valve for the impacted tap and transform it clockwise to shut off the water system. If you're incapable to locate the shut-off valve, you may need to turn off the major water to your home.
Dismantling the Faucet
Make use of a screwdriver to remove the manage of the faucet, revealing the interior components. Relying on the kind of tap, you may need to unscrew a cap or collar to access the shutoff assembly.
Ensuring Correct Functionality
After verifying that the tap is leak-free, examination its capability by turning it on and off numerous times. Ensure that the faucet runs efficiently and without any uncommon noises or resistance.
Tidying up
Ultimately, clean up any kind of debris or spills from the repair work procedure and deal with any type of old or broken components effectively. Leaving the work area clean and tidy makes sure a specialist finish to your repair work.
Evaluating for Leakages
Once the tap is rebuilded, turn the water system back on and examine the faucet for leakages. If you see any type of leakages, ascertain the connections and tighten them as required.
Conclusion
Repairing a dripping faucet is a relatively basic DIY job that can save you money on water costs and avoid more damage to your plumbing system. By following this step-by-step overview, you can tackle the repair with self-confidence and appreciate the benefits of a leak-free faucet.
Fixing a Leaking Tap: Causes, Solutions, and Water Conservation
Causes and Signs
Worn-Out Washers: The tap washer, rubber or metal, creates a seal within the tap assembly. Over time, the old washer can deteriorate, leading to water seepage and a dripping tap. High Water Pressure: Excessive water pressure can strain tap components, causing leaks. The forceful water flow exerts pressure on the washers and other sealing mechanisms, resulting in a dripping tap. Faulty O-Rings: O-rings, usually made of rubber, provide a watertight seal between moving parts of the tap. If the O-rings become worn or loose, they can cause water to leak, resulting in a dripping tap and potential water damage to your property. Signs of a Dripping Tap
Audible Dripping Sounds: If you hear the sound of water droplets hitting the sink or basin, it’s a clear indication of a dripping tap. Puddles or Stains: Notice any puddles of water or stains around the tap area or on the sink surface. These signs suggest a dripping tap that requires attention. Reduced Water Flow: A dripping tap can affect the overall water flow, resulting in reduced pressure when using the tap. Gather the Necessary Tools
Adjustable spanner Screwdriver – flathead or Philips’s head New washers Towels or rags Turn Off the Water Supply
Find the isolation valve beneath the sink or by the tap and turn it clockwise to shut off the water supply.
Disassemble the Tap
Use a screwdriver to carefully remove the tap handle, exposing the internal components. Take note of the order and arrangement of the parts as you disassemble the tap. This will aid in reassembling it correctly later on. (We recommend taking photos on your phone for a no-fuss solution).
Inspect and Replace the Washer
Inspect the washer located at the bottom of the tap assembly. If it appears worn out or damaged, replace it with a new washer of the correct size and type. This simple replacement can often resolve the dripping tap issue.
Tips for Responsible Water Usage
Regular Inspection and Maintenance: Conduct periodic inspections of all taps in your home to identify potential leaks or drips. Timely repairs prevent water wastage and maintain the efficiency of your plumbing system. Install Water-Efficient Taps: Consider replacing old taps with water-efficient models that are designed to minimise water consumption. Look for taps equipped with aerators and flow restrictors to regulate water flow without compromising functionality. Conscious Water Usage: Develop mindful habits such as turning off the tap while brushing your teeth or soaping your hands. Additionally, use full loads when running dishwashers and washing machines to maximise water efficiency. Monitor Your Water Bill: Keep track of your water consumption by regularly monitoring your water bill. Any sudden increases may indicate a leaking tap or other issues that require attention. When to Seek Professional Help
Persistent Leaks: If your attempts to fix the dripping tap are unsuccessful or the problem keeps recurring, it may indicate an underlying issue that requires professional attention. Complex Repairs: In cases where the tap assembly is intricate, or the repair involves specialised knowledge, it’s advisable to seek professional help to ensure the problem is resolved effectively. https://proudplumbingandgas.com.au/blog/a-complete-guide-to-fixing-a-leaking-tap/
I was made aware of that write-up on How to fix a leaky tap and save water from a good friend on a different site. Are you aware of someone else who is interested by the topic? Feel free to promote it. Bless you for your time. Kindly visit our site back soon.
Book Your Service Report this page